NOTE: Items in blue must be provided to your Web Ninja contact to create the connection between your website and MYOB Acumatica.
Step 1: Login to MYOB Acumatica and set-up a new API user. You may need your MYOB partner to help with this if your login doesn't have high enough permissions.
Go to More Items>> User Security>> Users.
- Set-up a user in MYOB with 'Full User API' access.
- Once created, provide the API username and password to your Web Ninja contact.
- Provide the MYOB Acumatica URL login to your Web Ninja contact. It will look something like this:
yourcompanynamehere.myobadvanced.com
Tip: it's a good idea to set-up a standard user account for Web Ninja so that the Ninja assisting you can easily log into MYOB to help guide you on data requirements.
Step 2: Validate and Publish the Web Ninja Customisation
Your Web Ninja contact will send you the latest customisation file to publish. We recommend passing this onto your MYOB partner to publish to avoid possible mistakes.
- Do not unzip the file; just import the zipped file.
- Once you have imported the file, validate it and then publish it. This is most important.

Step 3: Set WebNinjaApi Endpoint
In MYOB, You can either Search for "endpoint" and go directly to your list of endpoints, or else you can navigate to:
More Items>> Integration>> Preferences>> Web Service Endpoints.
There you need to select the WebNinjaApi option (note - the name may be slightly different as it may contain a newer version # by the time you're reading this article)
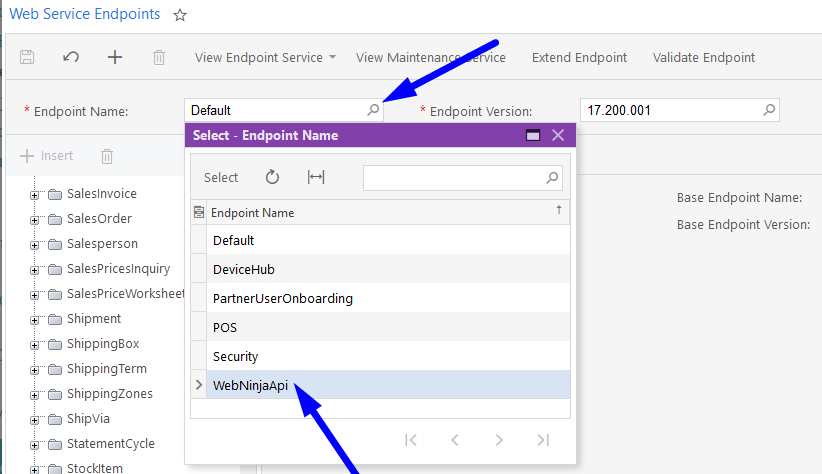
Choose Endpoint Version 20.200.001

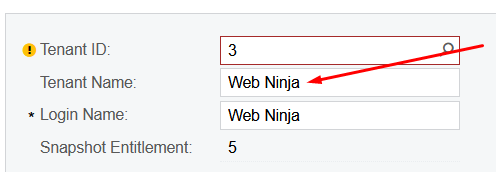
Step 4: Get the API Tenant Name
To get the API tenant name, go to:
More Items>> System Management
Click on Tenants under System Maintenance and locate the Tenant Name.
The Tenant Name is required for the integration so please provide this to your Web Ninja contact. (please note: the example "Web Ninja" below is just for demonstration, this will most likely be your own company name in this field).
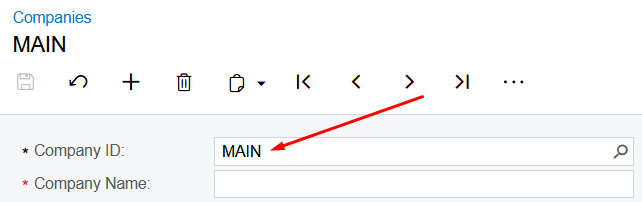
Step 5: Get the Company ID
To get the Company ID, go to:
More Items>> Configuration
Click on "Companies" which is usually located under 'Organisation'.
Click into the Company ID field and copy the ID and then send this ID to your Web Ninja contact. (the default is generally "MAIN")
Step 6: Set the API user to the Administrator role
Ensure the API User account is ticked for full Administrator access.
To do this, go to:
More Items>> User Security>> Users (Under User Management).
Search for the API User account under the 'Roles' tab, make sure 'Administrator' is ticked.

Scroll down the list until you see ODatav4 in the Role Name column, and make sure that's ticked as well.
![]()
IMPORTANT: If there are NO licenses available, the customer will need to contact their MYOB Partner to get an API license added
Step 7: Set the API Calls to 1500
The default number of API calls that MYOB will accept is 1500 per day. Make sure that this is actually set to 1500 in Acumatica's restrictions and API settings.
Step 8: RECAP: Provide the following items to your Web Ninja contact:
- URL to the login page of MYOB Acumatica. It will look like this: https://webninja.myobadvanced.com
- The API User account's Username
- The API User account's Password
- The API Company(Tenant) Name
- The API Branch(Company) Name