Confirm that you have SOAP API services and Access Tokens enabled in your integration settings.
IMPORTANT NOTE: Web Ninja does not currently integrate with the REST version of Netsuite. If you're not sure which version you are using, please contact your Netsuite partner.
Your Web Ninja contact will require these API details to connect to Netsuite.
Initial Token Setup
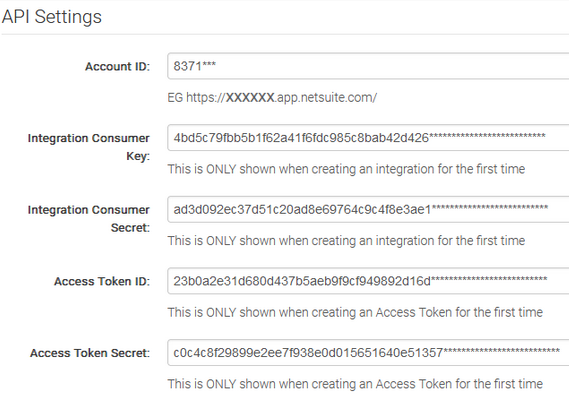
The account ID can be found in the:
set-up > Integrations > Soap Web Service Preferences.
API User Permission Tokens
For the rest of the tokens, you can follow the guide below or hand this over to your Netsuite partner.
To create the rest of the tokens, start by creating a 'Web Ninja' user with an administrator role (admin can be removed once the API is set-up).
Login to Netsuite, selecting the Administrator role when prompted (if you are not given a prompt, there is a section in the top right to switch users/roles).
NOTE: The Web Ninja user needs to have Administrator and Web Ninja Integration access.
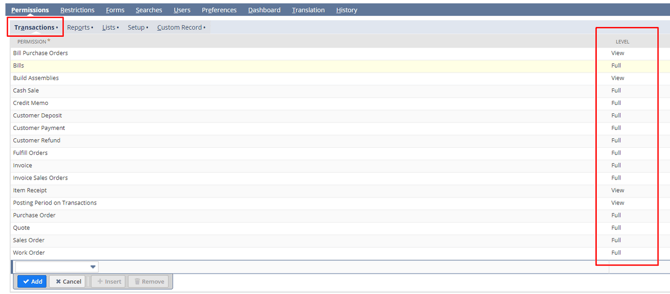
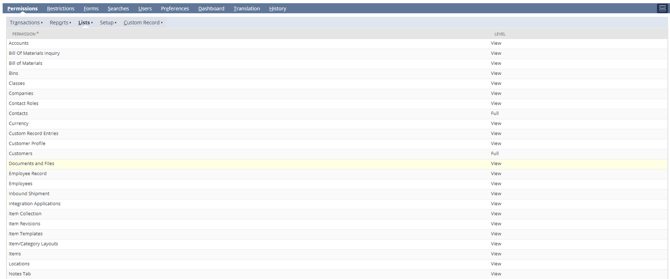
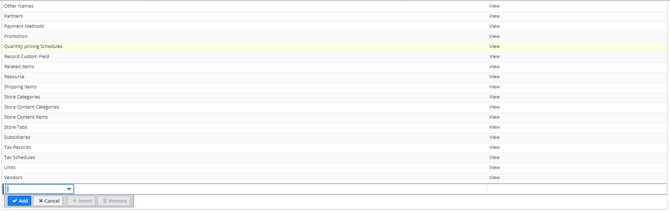
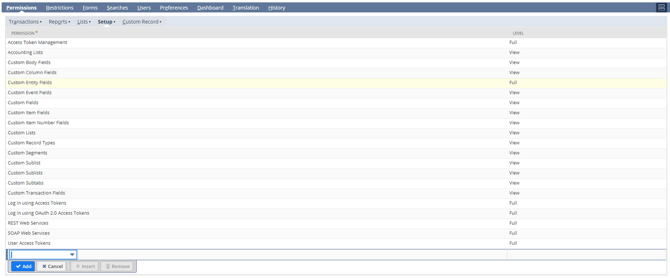
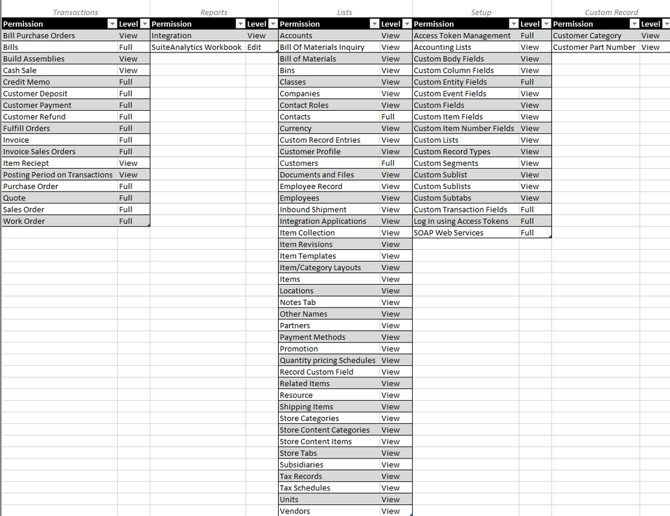
Go to Users, Edit user, Access, and make sure you have the Web Ninja integration role selected and then assign these settings and roles.

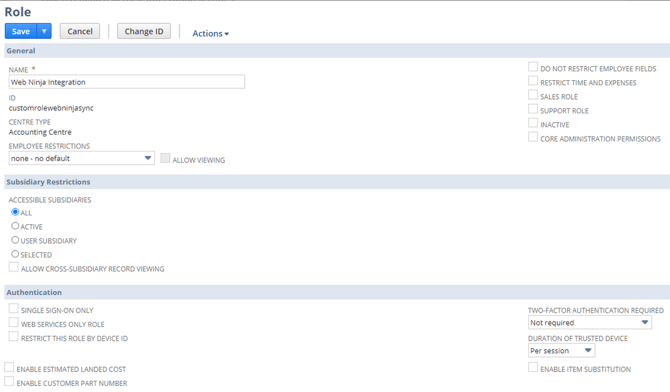


Save the Role once completed.
Next, go to Integration (again use search at the top). You may need to go to the List menu item at the top to get to the list view.

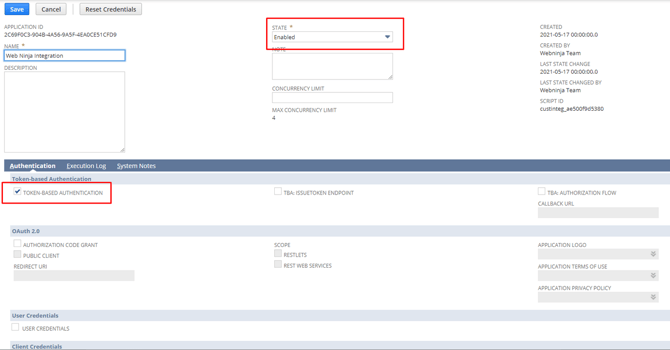
Click “Save”, and ensure that you copy and paste the client credentials that appear in the next screen. Store them somewhere for the moment as you'll need these soon.
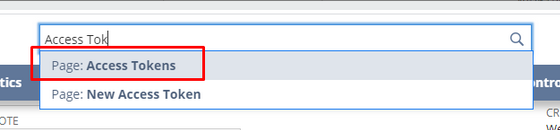
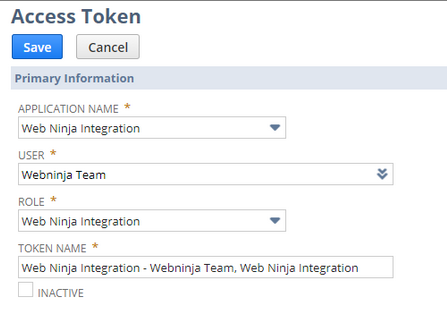
Finally, create the access tokens.
Once the tokens have been created, send the tokens to your Web Ninja contact. Again, these are the tokens required: